Wall Fixings 101: Hanging and Mounting Safely
Hanging items on your walls can transform a space, whether it’s shelving, artwork, or even a flat-screen television. Few things are as satisfying as seeing a piece securely mounted where it belongs, both functional and aesthetically pleasing. However, improper wall fixings can lead to disaster, from crooked picture frames to heavy items crashing down, damaging your walls, and floors, and even risking personal injury.
The key to any successful wall fixing is understanding your wall type, choosing the correct fixing method, and using the right tools. This article will guide you through these essential steps, helping you hang and mount items safely and securely.
Understanding Wall Types
Before you begin any wall-fixing project, you need to understand the type of wall you’re working with. This will determine the kind of fixings and tools you should use to ensure a secure result.
1. Plasterboard
Plasterboard, also known as drywall, is commonly used in modern homes. It’s relatively lightweight and easy to work with, but it isn’t designed to support heavy loads without proper reinforcement. Fixing items directly into the plasterboard without suitable fixings can cause the material to crumble, leading to weak, unstable mounts.
- How to Identify: Lightly tap on the wall—if it sounds hollow, it’s likely plasterboard. You may also find plasterboard walls that have stud frames behind them.
2. Brick
Brick walls are solid and robust, making them excellent for supporting heavier loads. However, drilling into brick can be tricky, and improper fixings can result in loose or unstable mounts.
- How to Identify: If you can see exposed brick or masonry, it’s a brick wall. Otherwise, try tapping—brick walls will give a solid sound.
3. Concrete
Concrete walls are extremely strong and durable, often found in modern buildings or external walls. Fixing items to concrete requires specialised tools and fixings, but the results can handle significant weight.
- How to Identify: Like brick, concrete walls will produce a solid sound when tapped, but they tend to be even harder to drill into.
How to Identify Your Wall Type
If you’re unsure of your wall type, a few quick tests can help. Tap along the wall—hollow sounds usually indicate plasterboard, while solid sounds suggest brick or concrete. You can also drill a small pilot hole in an inconspicuous area to inspect the material. Alternatively, a stud finder can help you determine whether there are wooden studs behind the plasterboard.
Types of Fixings
Different wall types require different fixings. Using the correct one for your wall type and the item’s weight is essential for a safe and stable result.
1. Rawlplugs
Rawlplugs are the go-to fix for many DIYers. They’re used in conjunction with screws to provide a secure anchor in materials like plasterboard, brick, or concrete. When the screw is inserted, the raw plug expands to grip the surrounding material, creating a stable hold.
- When to Use: Rawlplugs are ideal for medium-weight objects such as shelves, mirrors, or heavy picture frames. Make sure you select the appropriate size for both the screw and the material.
2. Screws vs. Nails
- Screws: Screws offer superior strength and security, especially when used with raw plugs. They’re more versatile than nails and can be removed and reinserted without compromising the fixing.
- Nails: Nails are generally quicker to install and work well for lightweight items, but they don’t offer the same level of hold as screws. Over time, nails can work themselves loose, especially in plasterboard or soft materials.
3. Anchors
Anchors, or cavity wall fixings, are designed for hanging heavy items on hollow walls like plasterboard. They spread the weight across a larger area of the wall, making them ideal for heavier loads such as large shelves, televisions, or cabinets.
- Types of Anchors:
- Toggle Bolts: These have wings that open behind the plasterboard, offering strong support.
- Molly Bolts: These expand behind the wall, creating a wide grip for heavier items.
4. Adhesive Strips
For lightweight objects like small pictures, posters, or decorations, adhesive strips (such as Command strips) can be an excellent alternative to drilling. They don’t damage the walls and can be easily removed without leaving marks.
- When to Use: Adhesive strips are best for lightweight items that don’t require a permanent fixture. However, avoid using them in areas of high humidity (such as bathrooms) or on rough surfaces where they may not adhere properly.
Tools for the Job
1. Drills: Choosing the Right One for Your Walls
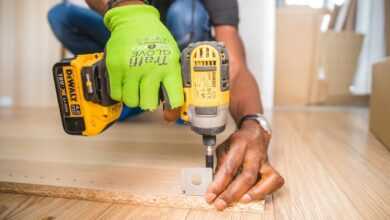
A drill is essential for creating pilot holes in walls before inserting screws or anchors. The type of drill you use depends on your wall type:
- Plasterboard: A standard drill or cordless drill will suffice for drilling into plasterboard. Ensure you’re using the right bit for plasterboard and avoid pressing too hard to prevent damage.
- Brick/Concrete: A hammer drill is necessary for masonry work. These drills use a hammering action to break through tough materials like brick or concrete. For these tasks, a masonry drill bit is essential.
2. Drill Bits: Matching the Bit to the Material
Choosing the correct drill bit for the material is crucial for a clean hole and secure fixing.
- Wood/Plasterboard: Use standard drill bits or high-speed steel (HSS) bits for softer materials.
- Brick/Concrete: Masonry drill bits are specially designed to penetrate tough materials. They have a wider tip that helps break through brick or concrete.
3. Stud Finder: How to Locate the Best Spot to Fix
A stud finder is a handy tool for detecting wooden studs behind plasterboard. Fixing heavy items to a stud provides a secure hold since the stud is attached directly to the wall frame. When using a stud finder, move it slowly across the wall and mark where the stud is located for future reference.
Step-by-Step Guide
1. How to Mark Out and Drill Correctly
Accurate marking is crucial for a neat, level result. Follow these steps to ensure you’re ready to drill:
- Measure and Mark: Use a tape measure and spirit level to ensure your marks are evenly spaced and level. Mark the spot lightly with a pencil where you intend to drill.
- Drill a Pilot Hole: Use the appropriate drill bit for your wall type and create a small pilot hole. This makes inserting the rawlplug or anchor easier and ensures the screw doesn’t cause the wall material to crack.
2. Inserting Fixings and Securing Items
- Insert the Rawlplug or Anchor: Gently tap the Rawlplug or anchor into the pilot hole with a hammer until it’s flush with the wall.
- Screw into the Fixing: Insert the screw into the raw plug or anchor and tighten it with a screwdriver or drill. Be careful not to overtighten, as this can strip the raw plug or damage the wall material.
3. Ensuring Everything Is Level and Secure
Before tightening the screws fully, use a spirit level to ensure everything is aligned. This is particularly important for items like shelves or cabinets that need to be perfectly level. Once you’re happy with the positioning, tighten the screws completely.
Fixing items to your walls can seem intimidating at first, but by understanding your wall type and using the right fixings, it becomes a manageable and rewarding task. Start with smaller projects to build your confidence, and soon you’ll be tackling more ambitious wall-mounting jobs with ease.
By following this guide and practising the right techniques, you’ll ensure that your wall fixings are secure, safe, and long-lasting—no matter the weight or type of item you’re hanging. Happy DIYing!

